How do I setup a custom sender domain (GoDaddy and others)
Setting Up a Custom Sender Domain in Recapture
Recapture sends email on behalf of your store. By default, we use a high-reputation sender domain that is generic (much like MailChimp and other ESP services)--rcmsv.net. We've done everything we can to make this deliverable--setup the SPF, DKIM and DMARC records, optimized the servers for sender reputation, and so on. But there's only so far that takes us. Email clients like Hotmail and Gmail, even when the domain has the "right reputation" still end up filtering the content on their end and we have little control over that. Whether your emails fall into that trap seems to be somewhat random, but there is a solution.
How to add records to the DNS for your provider
- Instructions for Shopify DNS, BigCommerce DNS, Namecheap and GoDaddy
- Instructions for all other providers
GoDaddy, Namecheap, Shopify DNS, and BigCommerce DNS instructions
Certain providers' setup is a little different than most and the records we provide you have to be entered in a particular way in order to be accepted and visible through GoDaddy's DNS.
These providers include, but are not limited to:
- GoDaddy
- Namecheap
- Shopify DNS (which uses GoDaddy behind the scenes)
- BigCommerce DNS (which also uses GoDaddy behind the scenes)
- And some other smaller ones, too.
If you don't follow these instructions carefully, your DNS records will not be visible to Recapture and we won't be able to send email on your domain's behalf properly.
1) First, contact us at Recapture to provide you with the DKIM records you'll need to insert. You just need to provide the domain of your store (e.g. mystore.com) to get started. We will create the DKIM records for you through our email service provider (ESP).
These DKIM records are like a "permission slip" for your domain, allowing Recapture to send email from you. This will not impact sending any email from your own servers or store in any way.
2) These instructions use GoDaddy as an example (because it's very common—but the idea is similar for other platforms). Start by going to your GoDaddy (or other provider) and login to your account
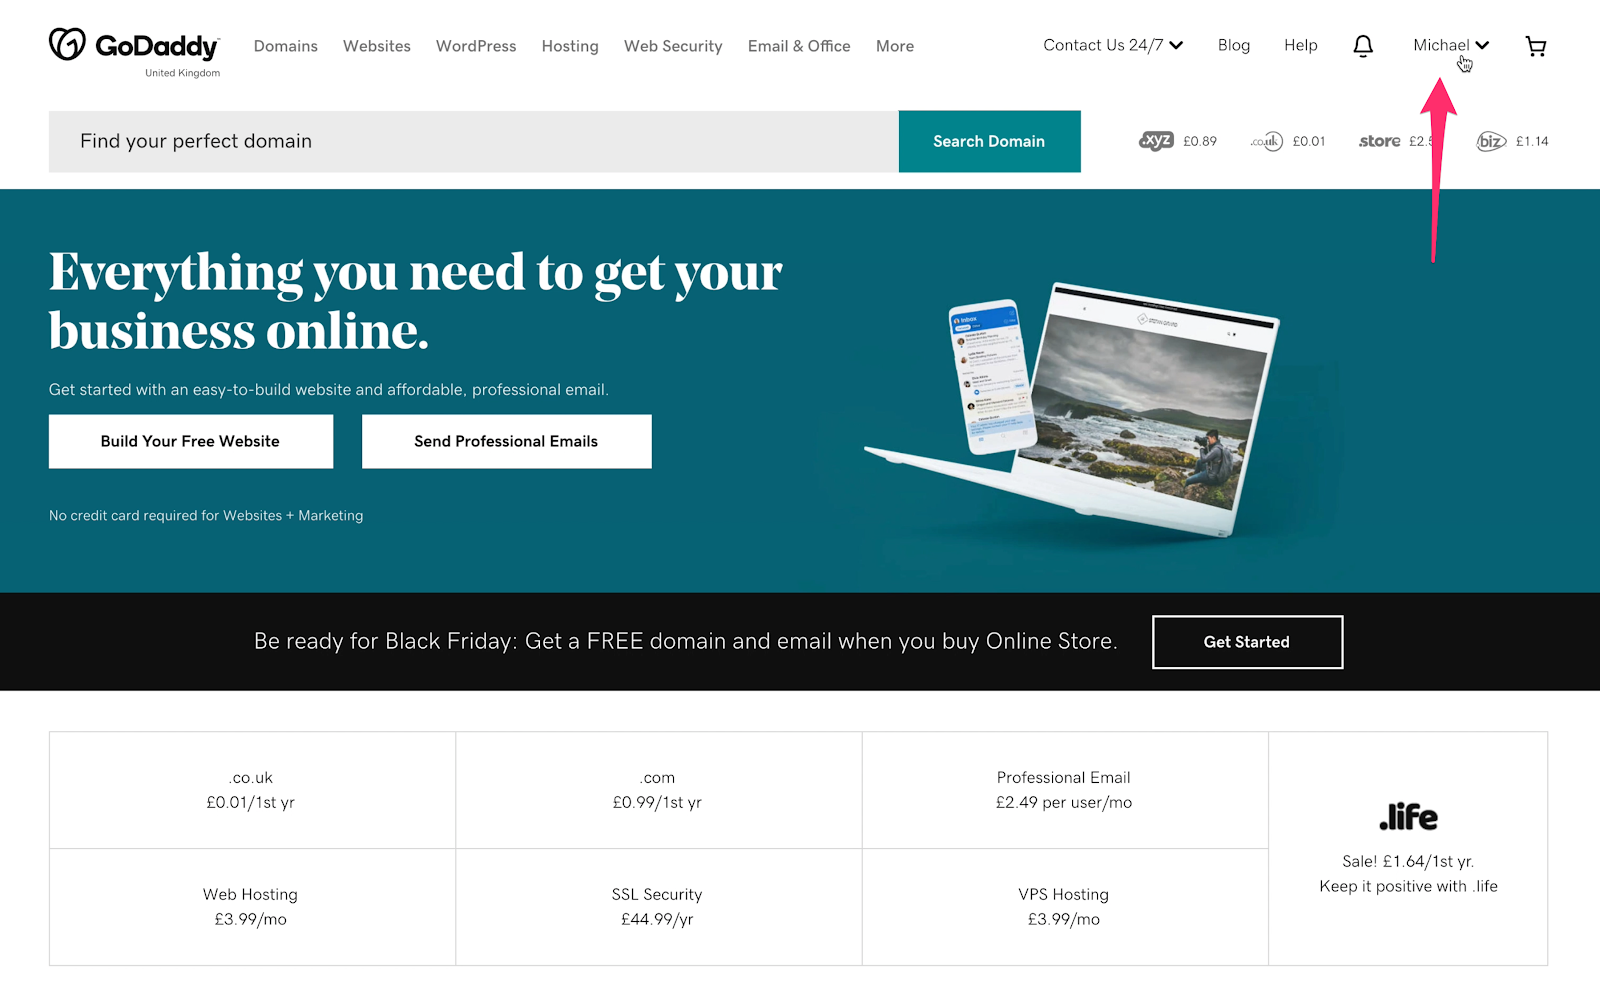
3) Once logged into GoDaddy, hover your mouse over your name from the top right order of the page to activate the dropdown menu
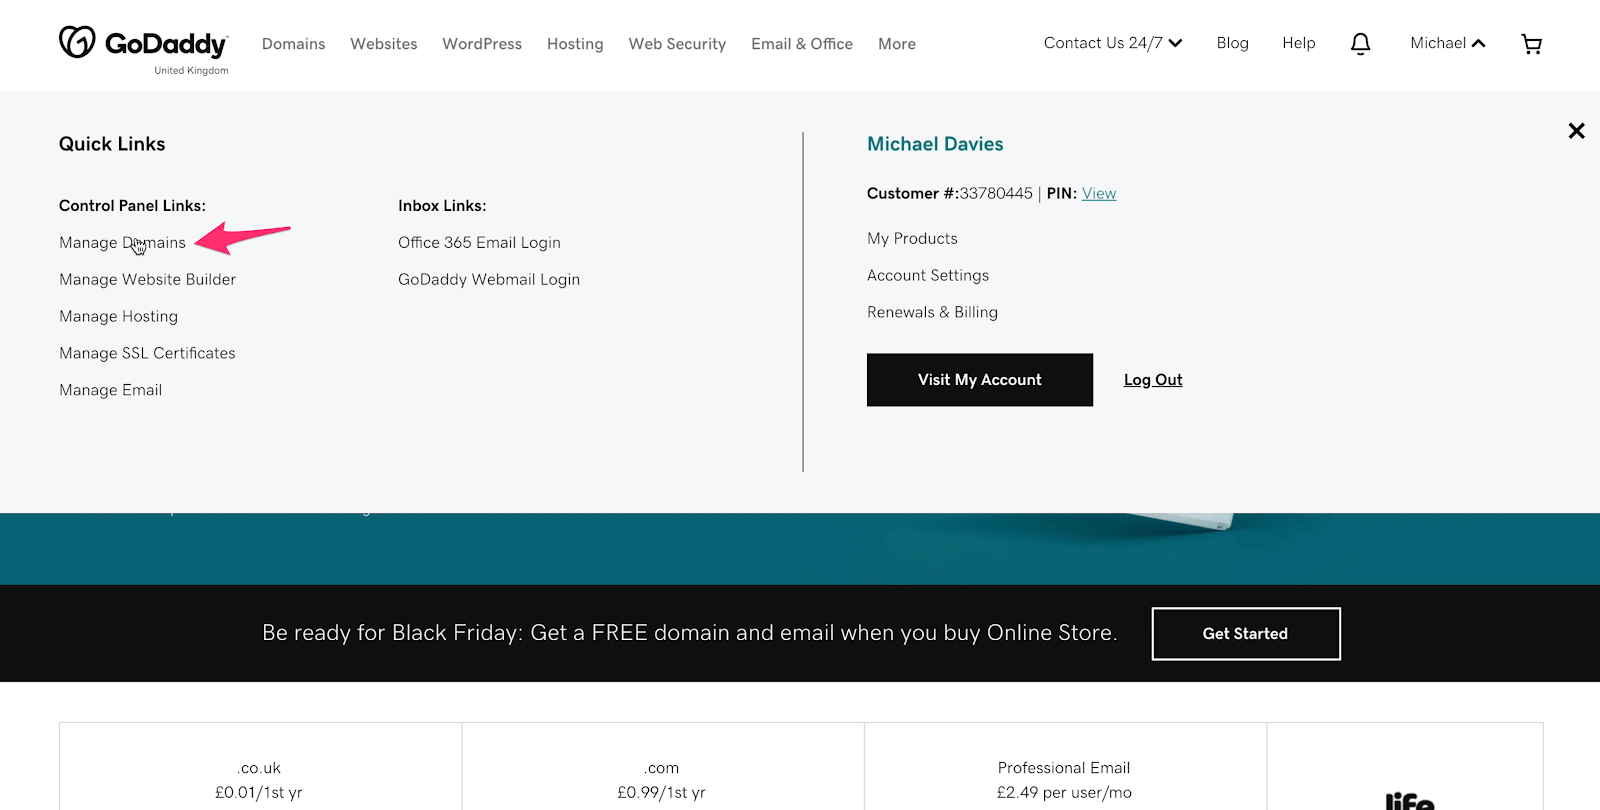
4) On the left side of the drop down menu click on Manage Domains
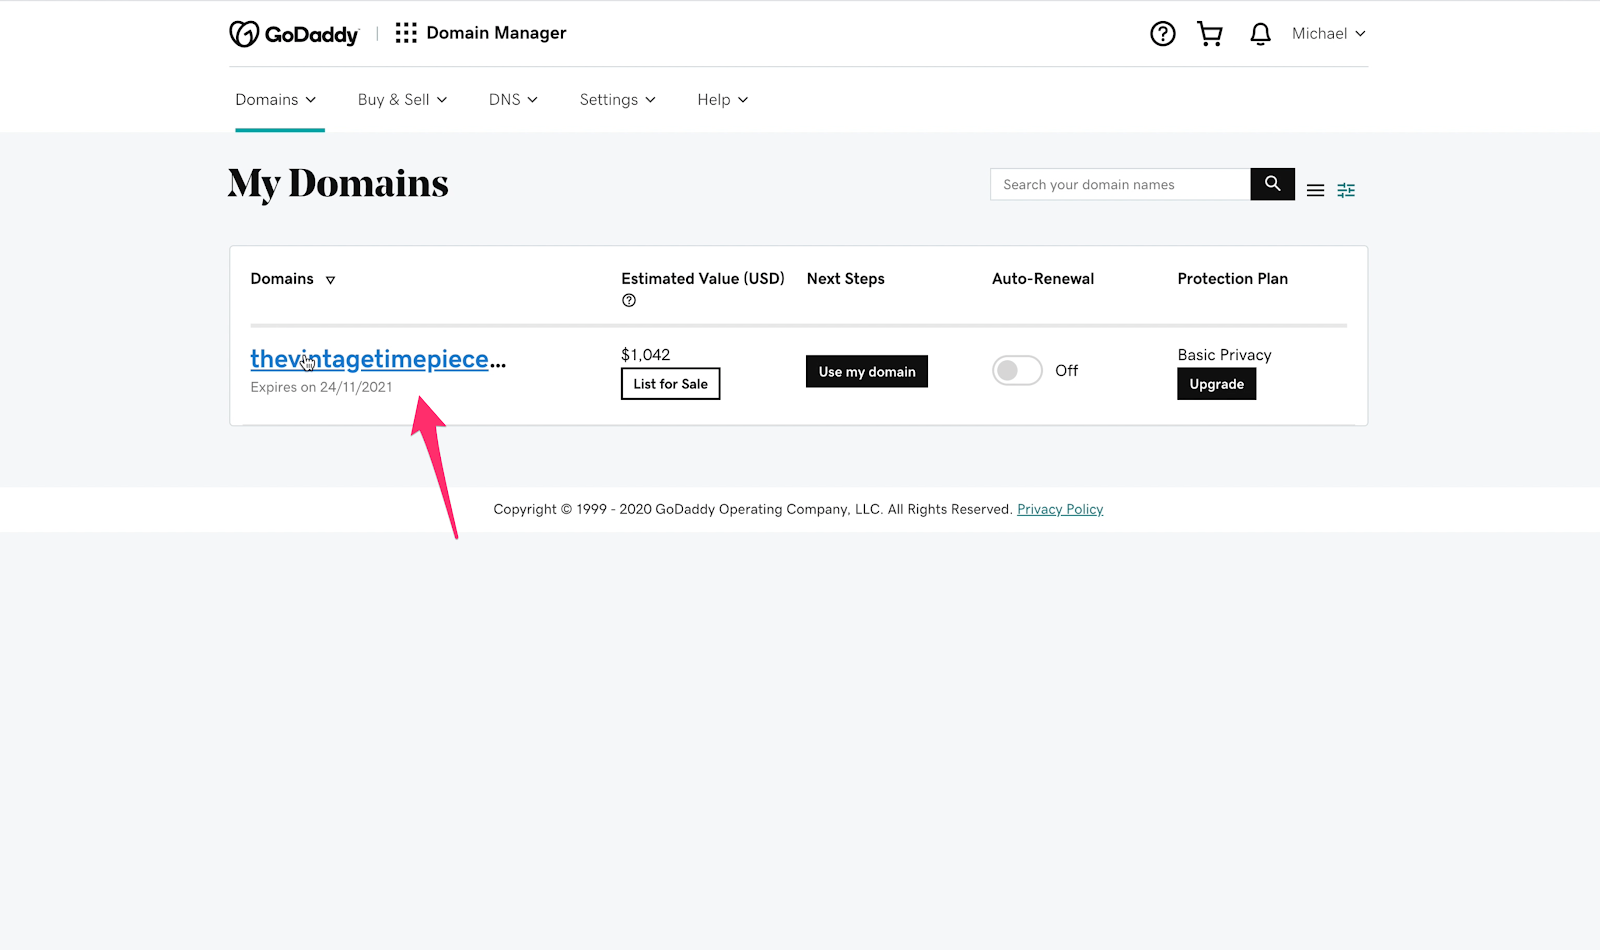
5) Click on the name of the domain you are going to authenticate
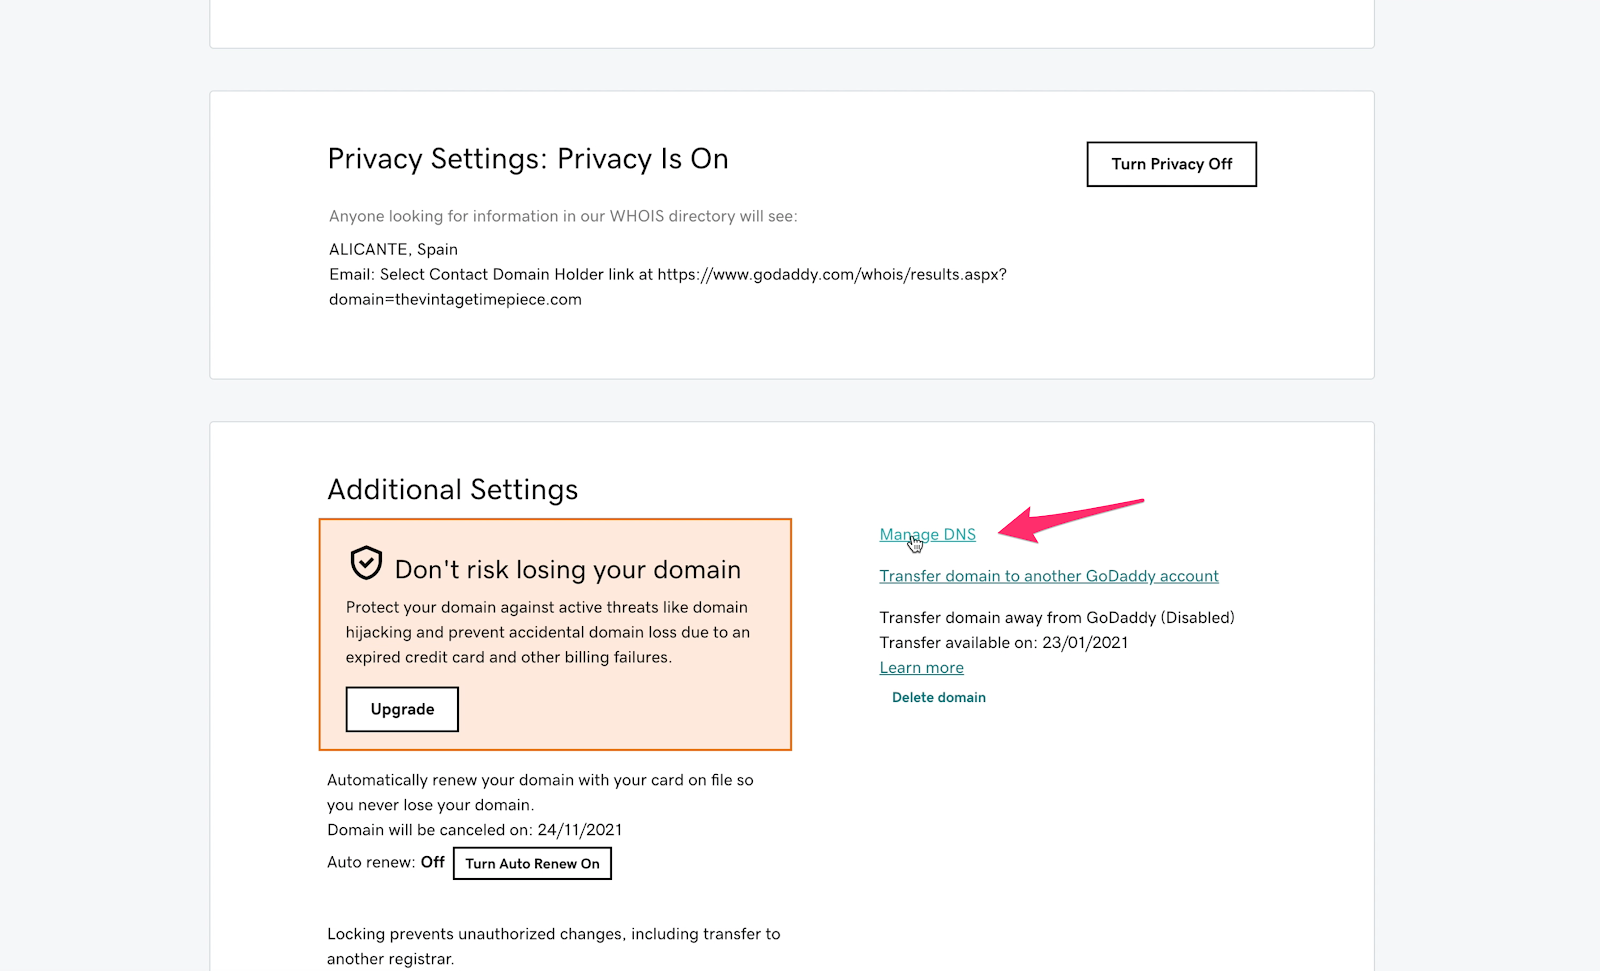
6) Scroll down to the Additional Settings section and click on Manage DNS
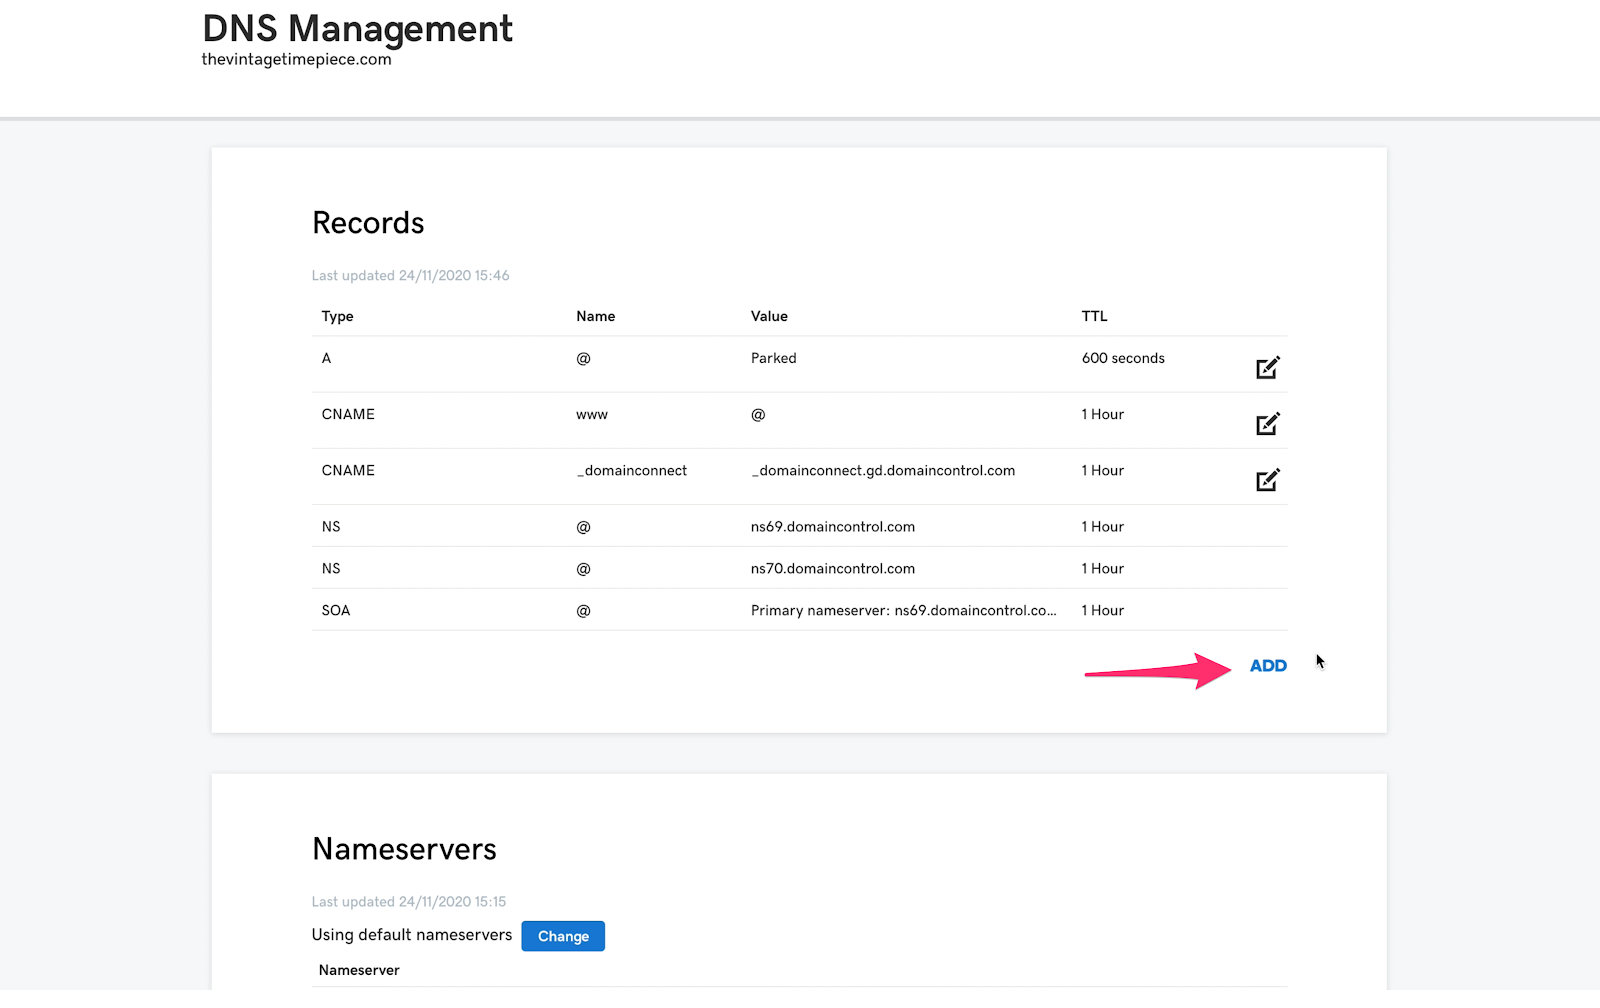
7) Open the DNS spreadsheet that we provided for you. This will contain the names of the records you have to insert. IMPORTANT: This is the tricky part, so make sure you put the correct values in!
8) Add each of the records in the list by clicking on the Add button in at the bottom of the record list
9) From the Type dropdown select the same value as shown in Type column in the spreadsheet
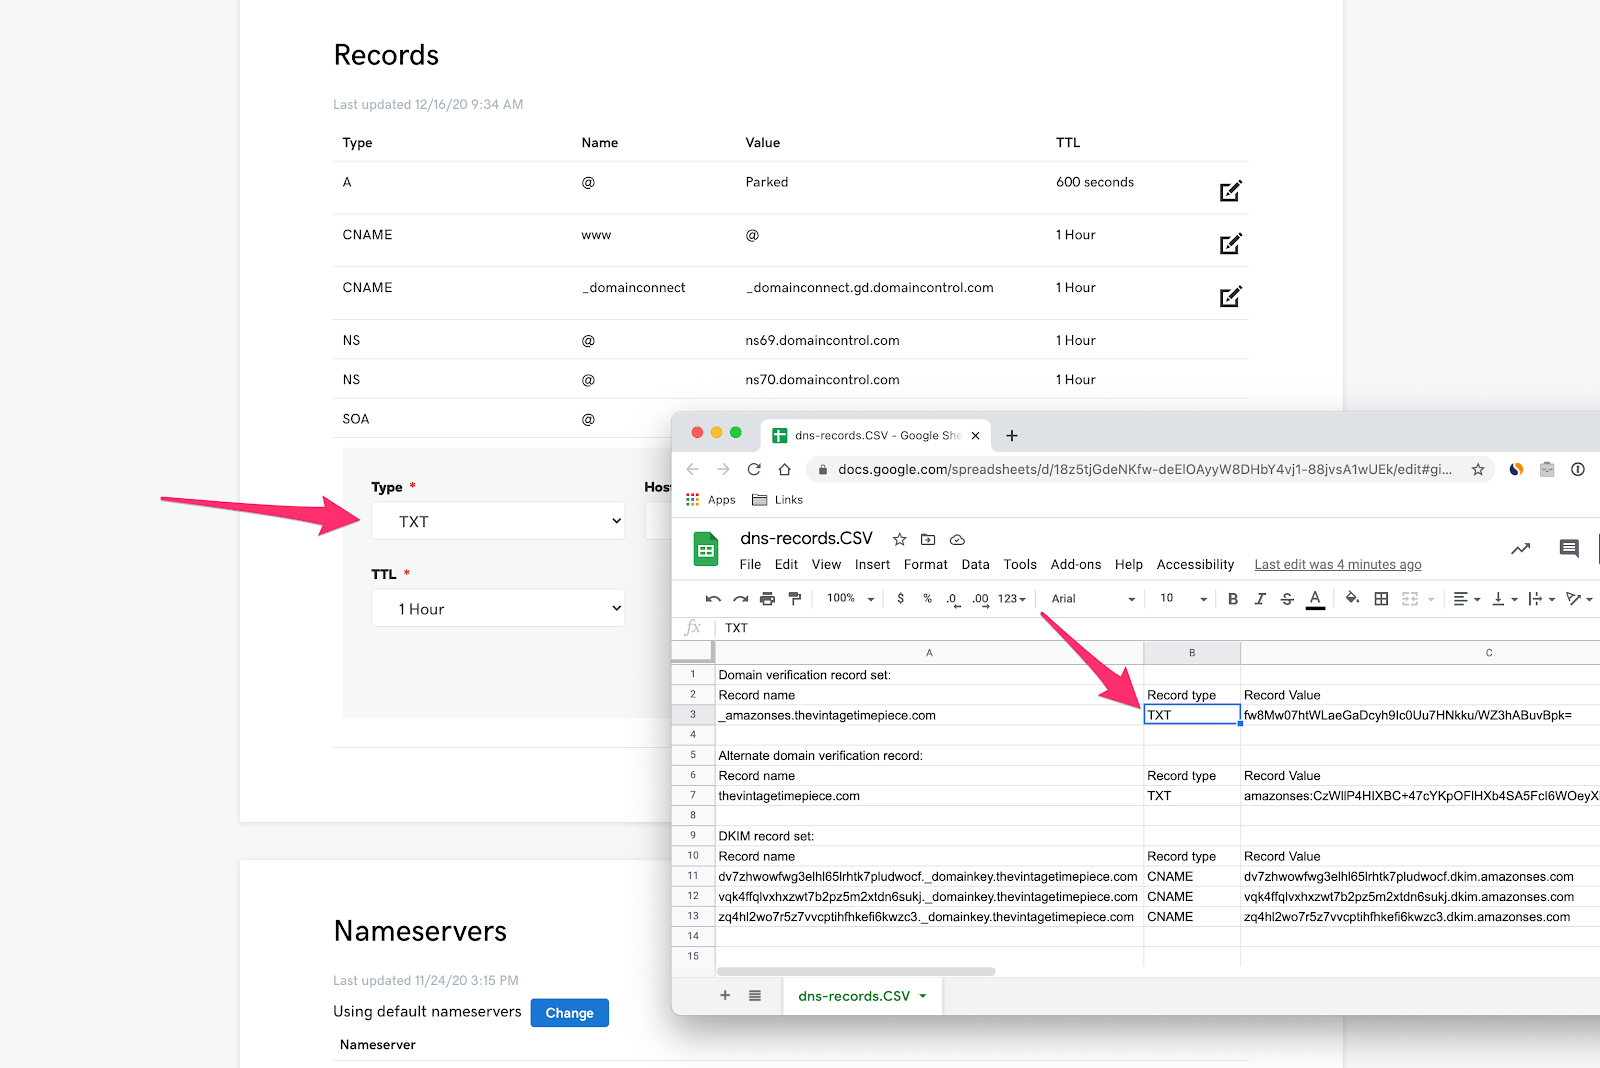
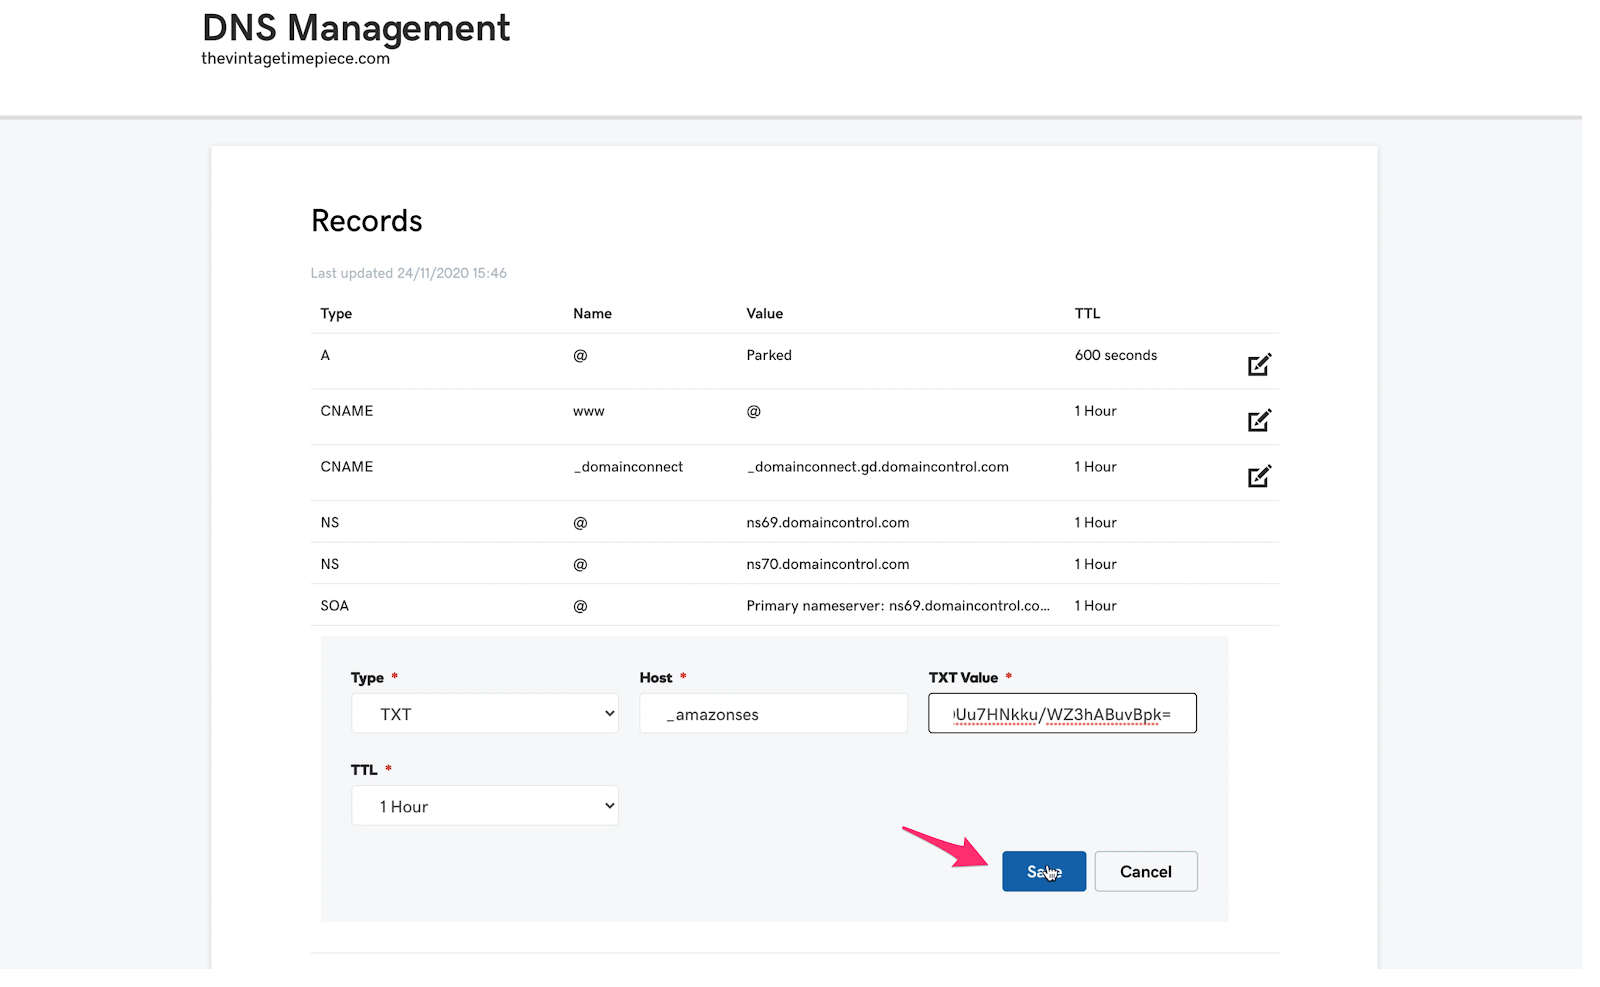
10) THIS IS THE MOST IMPORTANT STEP FOR ALL PROVIDERS LIKE GODADDY! In the Host field, copy the first part of the Record Name from the spreadsheet. As of Jan 2022, you ONLY need to enter the CNAME records, NOT THE TXT ones anymore.
Important: Only copy the text before your website domain.
For each of the 3 CNAME records, enter everything UP TO YOUR DOMAIN NAME. Drop the domain at the end of the DKIM record name. For example, if the spreadsheet shows:
it47tjmj36y6ja3px3trhjl55ref5zg4._domainkey.mydomain.com
You should enter:
it47tjmj36y6ja3px3trhjl55ref5zg4._domainkey
Instead. Repeat for all 3 CNAME records.
Lastly click the Save button.
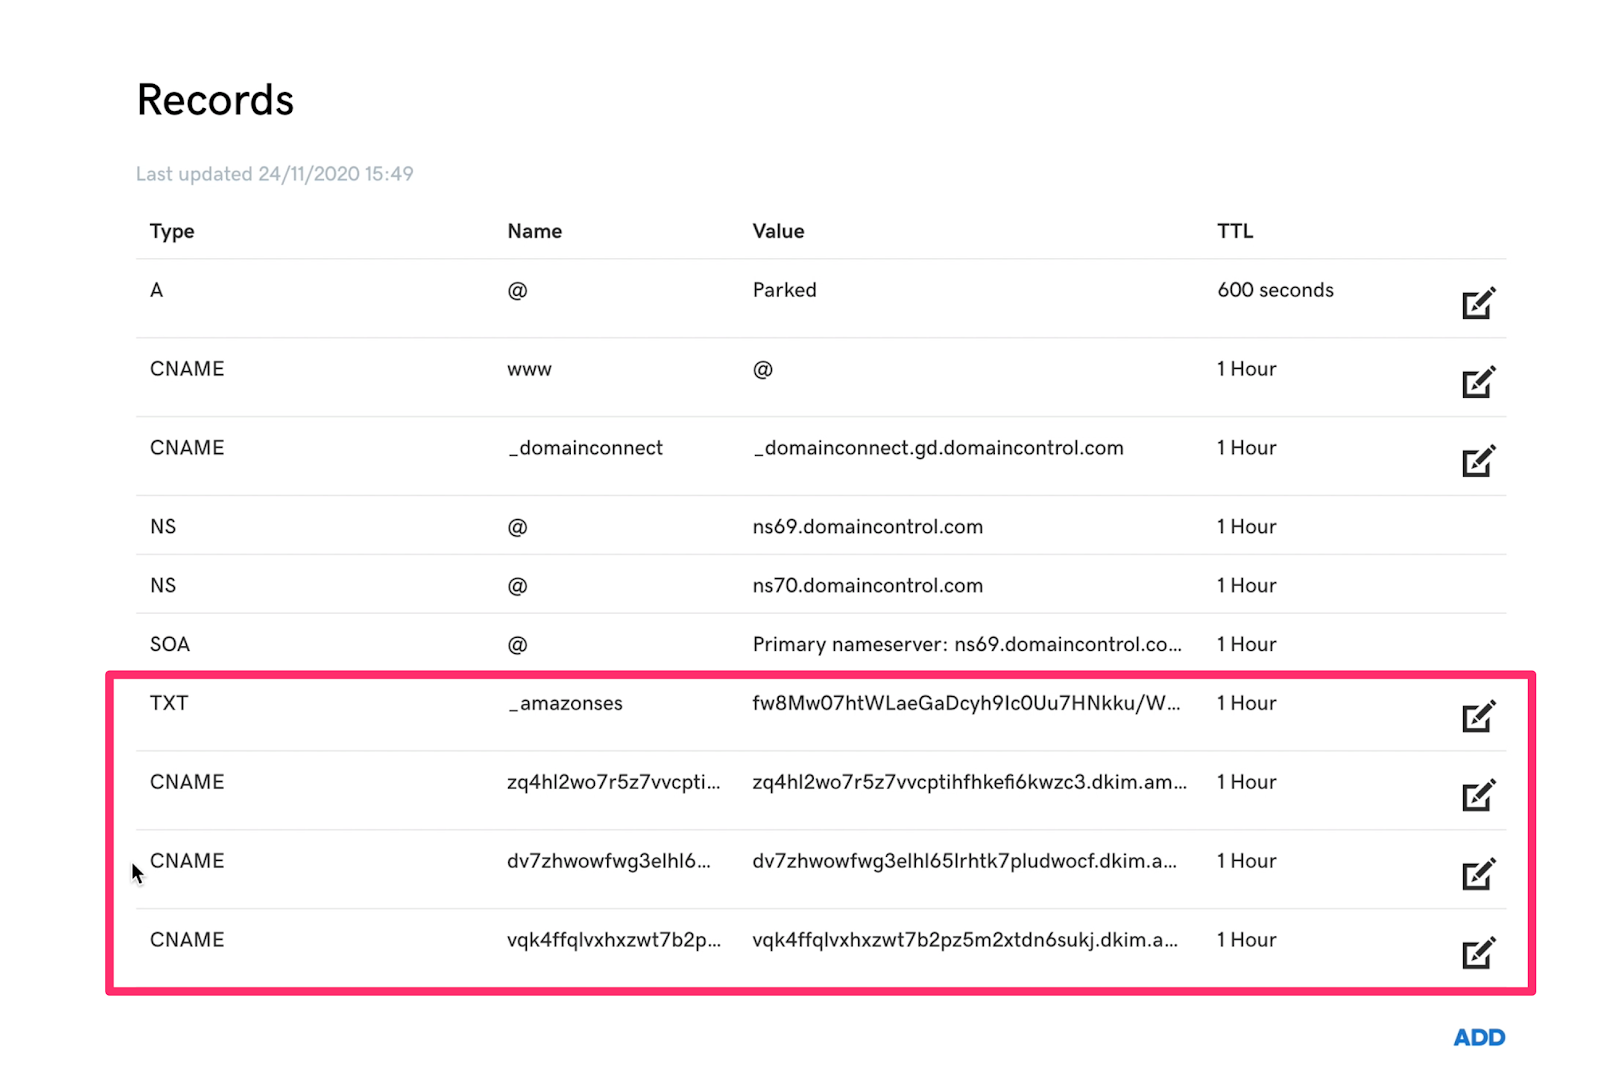
11) After adding the records you should see 3 new records added to the list (screenshot is OLD and shows 4--the TXT record is no longer necessary as of Jan 2022)
12) Contact us again and let us know that you're done adding the records. It generally takes 24-72 hours for these records to start showing up across the internet so that the validation process can finish. Once the records are validated, we can switch you over automatically.
13) If you have any questions, don't hesitate to ask!
All Other DNS provider instructions (except GoDaddy, Namecheap, Shopify DNS and BigCommerce DNS)
1) First, contact us at Recapture to provide you with the DKIM records you'll need to insert. You just need to provide the domain of your store (e.g. mystore.com) to get started. We will create the DKIM records for you through our email service provider (ESP).
These DKIM records are like a "permission slip" for your domain, allowing Recapture to send email from you. This will not impact sending any email from your own servers or store in any way.
2) Login to your DNS provider's admin dashboard.
3) Add the 3 CNAME records of the spreadsheet. Create a record of type "CNAME". Insert the data from the Name column for the "Domain" or the "Name" (depending on the provider). Insert the data from the Value column for the "Value". Save the record. Repeat for all CNAME records you have in the spreadsheet. IMPORTANT: You must insert all 3 CNAME records for this to work.
4) Once you're done, return to your domain dashboard and confirm that all 3 values have been inserted for your domain.
5) Contact us again and let us know that you're done adding the records. It generally takes 24-72 hours for these records to start showing up across the internet so that the validation process can finish. Once the records are validated, we can switch you over automatically.
6) If you have any questions, don't hesitate to ask!